With the tool Create React App, creating a React application is now more straightforward. The command-line utility will handle the complexity of setup, giving you a robust base for your projects. Here, we guide you through steps to create your first React app using CRA along with some tips that will help get you started.
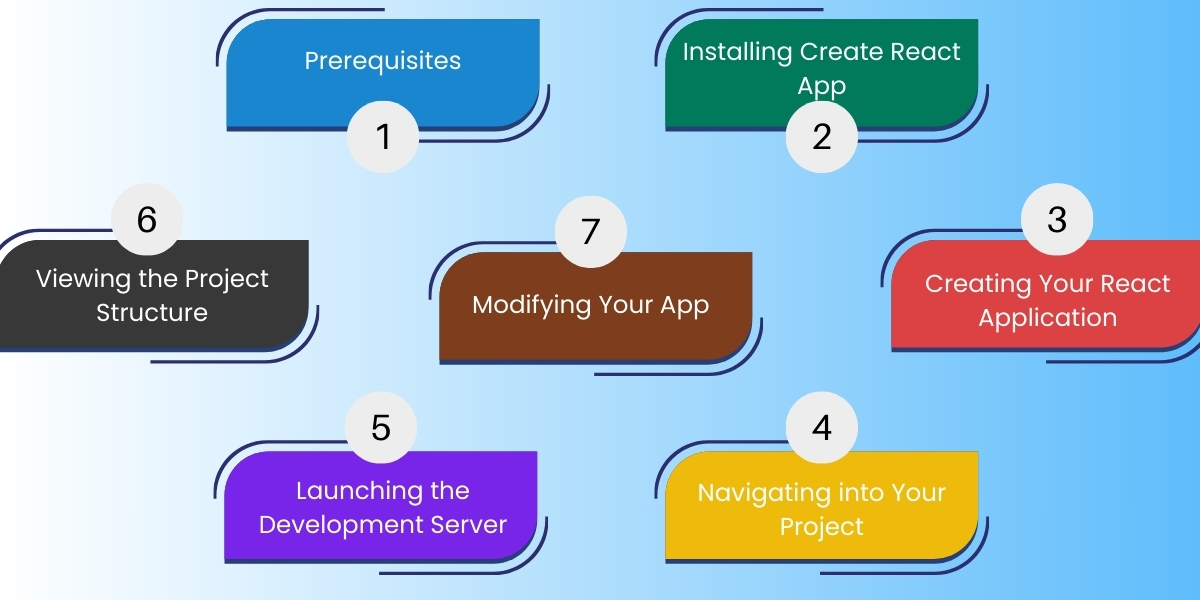
Step 1: Prerequisites
Before you dive in, make sure you have Node.js installed on your machine. This is required to manage packages.
Step 2: Installing Create React App
You will start by installing the Create React App tool globally on your system. This makes it available for use anywhere.
Step 3: Creating Your React Application
To create a brand new React app, navigate your terminal or command prompt to a directory you want your project to live in and use the command Create React App, substituting my-app with whatever name you want for your project. This generates a whole new directory full of all the configurations and files you need. It only takes a few moments-so be patient!
Step 4: Navigating into Your Project
Now, navigate into your new project directory. This is where all the files associated with your app are located.
Step 5: Launching the Development Server
In order to view your newly created React in action, start your development server. This will launch your default web browser and allow you to view your newly created React app live!
Step 6: Viewing the Project Structure
Your React app consists of several important folders and files:
- node_modules/: Contains all your project’s dependencies.
- public/: This folder holds static assets, including the HTML template for your app.
- src/: This is where you’ll spend most of your time, as it contains your JavaScript and CSS files. The main file is where your React app starts rendering.
- package.json: Lists your project dependencies and scripts.
Step 7: Modifying Your App
You can start modifying your app by editing the files in the src/ folder. Open the main JavaScript file and change the text to customize your application. Save your changes, and you’ll see them update in real-time in your browser!
Tips for Getting Started
- Explore Components: React is built around components. Familiarize yourself with creating and organizing components to build your app structure.
- Use React Dev Tools: Install the extension React Developer Tools for your browser. This will help you to inspect your React components and their properties.
- Learn State Management: Understand how you can manage state using hooks for functional components.
- Follow Best Practices: Keep your components small, focused, and reusable. You must use prop-types or TypeScript for type-checking to catch the errors early.
Conclusion
Creating a React app with Create React is very simple and would save you from a lot of configuration work. You now focus on the development of your application instead of fighting with configurations. Follow all these steps, and you will be well on your path to building dynamic, interactive web applications with React.
Build High-Performance React Applications with Confidence
Whether you’re launching a new digital product or modernizing an existing platform, Empirical Edge helps businesses design and develop secure, scalable React applications tailored to their goals. Partner with our experts to accelerate development, improve user experience, and bring your vision to market faster.
Frequently Asked Questions
Create React App is an officially supported tool that helps developers quickly set up a React application with zero configuration. It includes preconfigured tools for bundling, linting, and development so teams can focus on building features instead of managing complex setups.
CRA simplifies the development process by providing a ready-to-use environment with modern JavaScript features, fast refresh, and optimized production builds—making it ideal for both beginners and experienced developers.
Before starting, developers typically need Node.js and npm installed, as these tools manage dependencies and run the development server.
Yes. CRA generates optimized production builds that improve performance, reduce bundle sizes, and follow best practices for deployment.
Developers can extend CRA configurations using methods like “ejecting” or integrating additional tools, allowing flexibility as project requirements grow.
React is a strong choice for businesses building dynamic, high-performance applications that require reusable components, fast rendering, and long-term scalability.


